Storing Images and PDFs on your Squarespace Website
If you’ve ever wanted to share a Welcome Guide with a client or have an easily downloadable opt-in, but didn’t know where to store the files, this week’s post is for you.
Squarespace has a secret: you can upload files to your Squarespace website and it will be stored and given a unique URL that you can then share!

Early on in my work on Squarespace, I had a client request that I update the Quote block with quotation marks that matched her brand colors. Changing them in the style settings wasn’t an option and I was just learning about all the amazing things you can do with Custom CSS. Instead, I found a tutorial that had you upload an image and then link to it in order to replace the existing quotation marks.
So where was I supposed to host that image? Squarespace doesn’t give you access to the back-end files and you don’t have your own server, so the normal ways of uploading an image weren’t possible. Instead, I created a free account on a photo hosting website, uploaded the image, and used their link. While that worked out fine, I had to keep checking to make sure it was still displaying the way we planned because I didn’t control the website or how they stored files.
It was only later that I learned that Squarespace actually gives you the ability to store files on your own website. And that has made my job much easier.
Why you might need to store a file on squarespace
If you aren’t sure why you might use this feature, that’s okay. There are lots of people who won’t need it because of the type of business they run or because they have another way to deliver PDFs to clients and subscribers. But it’s always good to know what your options are.
These are some ways you might use the File option from Squarespace:
To host a PDF that subscribers can download once they sign up for your newsletter
To store a Welcome Guide (or outfit planning guide, investment guide, etc.) that clients can always access
To keep images that you need to use for Custom CSS and Code Blocks
Option 1: Upload an image to Custom CSS files
Your first option when it comes to uploading a file is most useful for images that you are going to use in the Custom CSS or Code Block.
1. Find the file you want to upload.
2. Go to Design > Custom CSS > Manage Files

3. Upload the file to this section
4. Click on the file to get the URL (it will appear in the Custom CSS code). Make sure to delete the code from the Custom CSS text if it isn’t where it needs to be.
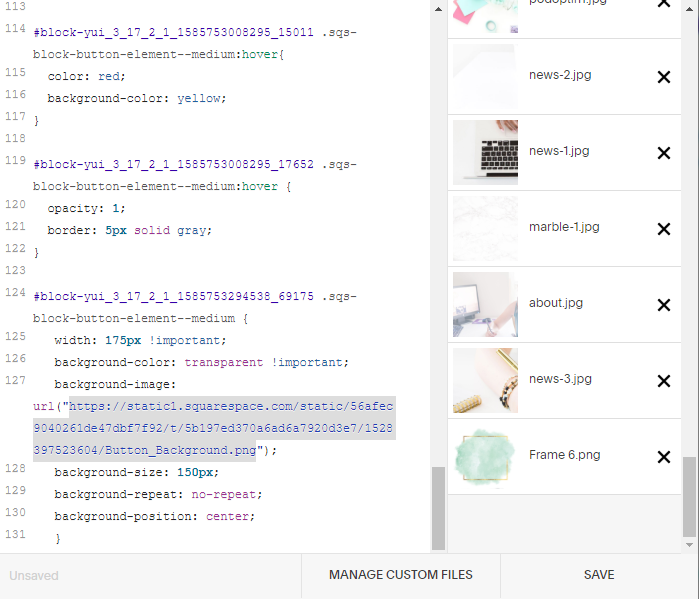
You can then use this URL wherever you need to link to the image (learn how you can use this to create a custom button). Make sure not to delete the file or it will no longer appear.
Option 2: Add a file as a link
This option can work for images or PDFs. I use it most often when storing a PDF that will be shared as a resource, like on the Curiosity Tank website.
1. Find the file you want to upload and go to the Pages menu.
2. Choose to create a new page in the Unlinked section
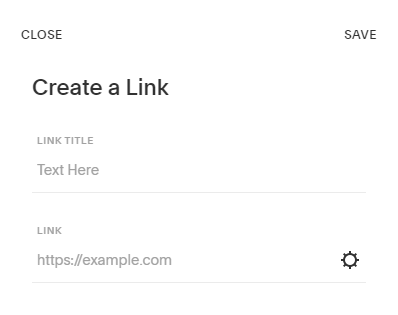
3. Choose Link under the Other heading

4. In the pop-up box, click on the gear icon to get to the link settings
5. Choose File and select “Upload File”
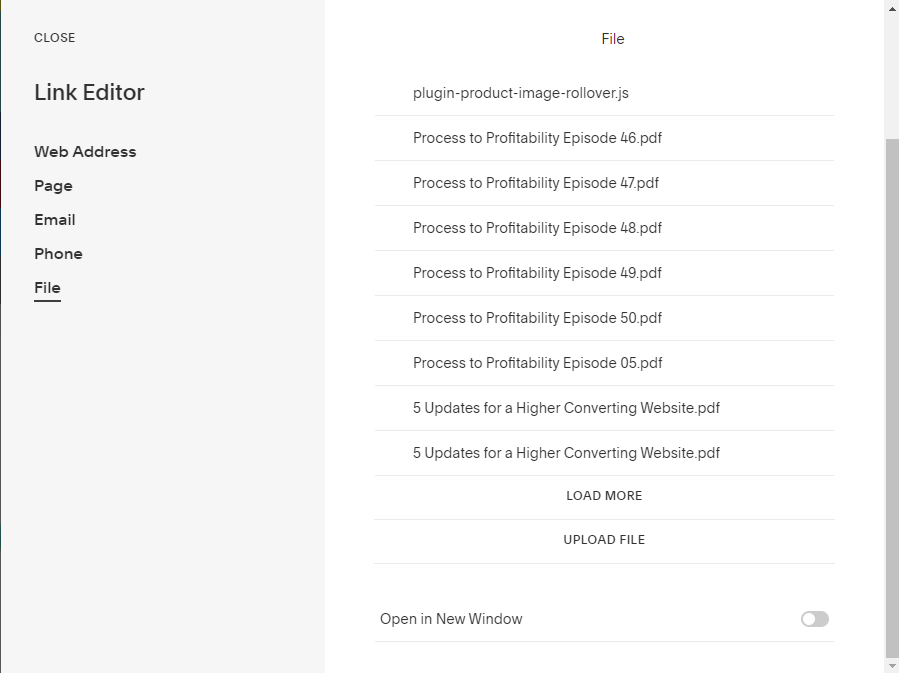
6. Once your file is uploaded, make sure to select it by clicking on the name in the file list. There will be a check mark beside the file that is selected.

7. Select “Close” to get back to the original pop-up box and copy the URL that now shows up in the Link section.
There is no need to then Save the link - once it’s been uploaded, it will stay there unless you remove it. Simply Close and ignore the prompt to save. If you do Save, there will now be a link symbol in the Unlinked section of your Pages menu. You can either leave it or delete it - it won’t delete the file. (I like to delete these links so my menu stays neater and easier to search through.)
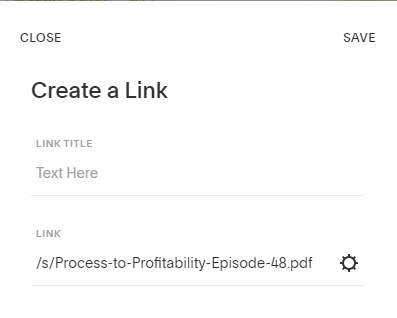
This URL will always start with /s/ and be followed by the file name and extention (.pdf, .jpg. etc.). If you are linking to the file on your Squarespace website, this is all you’ll need, but if you want to link to the file from another location, like Facebook, take these extra steps:
1. Type your website’s main URL into your browser.
2. Paste the file URL you copied behind it. When you hit “Enter,” it will redirect you to a new URL that starts with “static1.squarespace.com.” This URL will remain as long as you don’t delete the file.